Why Drywall Prep Matters
Paint does not hide drywall problems. In fact, a fresh coat of semi-gloss or satin sheen highlights them.
Every crack, dent, and imperfection becomes more visible once the light hits that new surface.
Professional painters know that the secret to a high-end finish isn’t just the paint itself. The real work happens during the preparation stage.
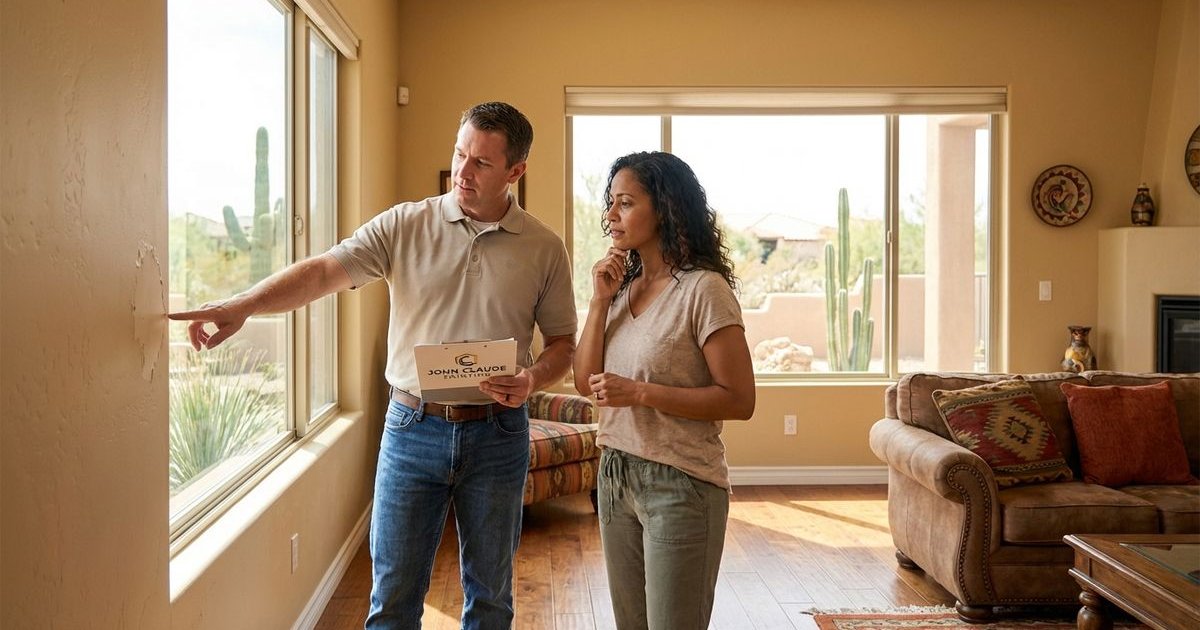
At John Claude Painting AZ, we address these surface issues as a standard part of every interior painting project. Our drywall repair services ensure your walls are properly prepared.
We have spent years refining our techniques in Ahwatukee and Gilbert homes.
Here are the five most common problems we encounter in the Metro-Phoenix area and the specific ways we fix them.
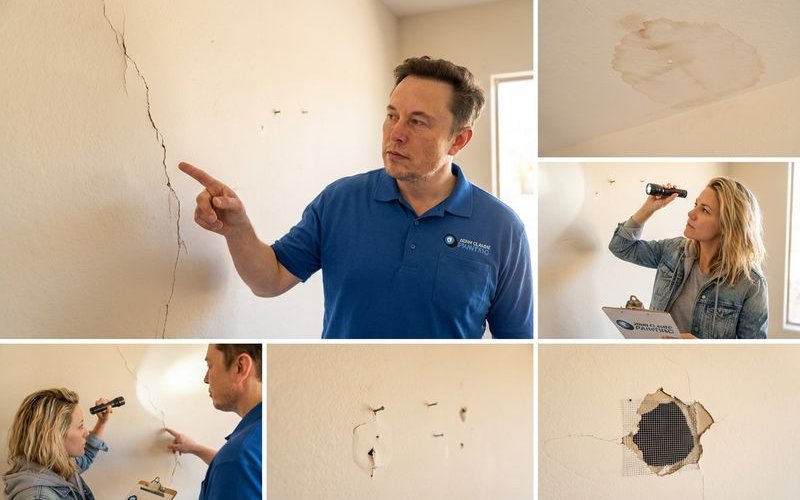
Problem 1: Nail Pops
Nail pops look like small, cosmetic circles or bumps on your walls and ceilings.
They occur when the drywall fastener pushes through the joint compound.
While they seem harmless, they often signal movement behind the wall that needs a secure fix.
Why This Happens in Arizona Homes
Wood Framing Shrinkage Newer homes in Chandler and the East Valley often experience this during the first few years. The lumber used for framing dries out in our arid climate. As the wood shrinks, it pulls away from the drywall, leaving the nail head exposed.
Truss Uplift We see this frequently in single-story Phoenix homes. The difference in humidity and temperature between the attic and the living space causes the bottom chord of the roof truss to arch upward. This movement pulls the ceiling drywall up, causing fasteners to pop near the corners.
Foundation Settling Expansive soil conditions in the valley can cause normal house movement. This creates stress on the drywall sheets. The fasteners eventually push forward under this pressure.
How We Fix Nail Pops
Simply spackling over the hole is a temporary mistake. The nail will almost certainly pop again within six months.
We follow a specific protocol to ensure the repair lasts:
- Secure the Sheet: We drive a new 1-5/8” drywall screw into the stud about an inch away from the popped nail. This re-anchors the loose drywall.
- Seat the Old Fastener: We drive the original nail or screw slightly below the surface of the drywall.
- Compound Application: Our team applies three thin coats of joint compound, feathering the edges to blend with the wall.
- Texture Matching: We replicate the surrounding texture (often Orange Peel or Knockdown) so the patch disappears.
Why “The Screw Test” Matters
You can test this yourself. Press on the drywall near the pop.
If the board moves, you have a fastening issue.
Adding that second screw is the only way to stop the movement and prevent the pop from returning.
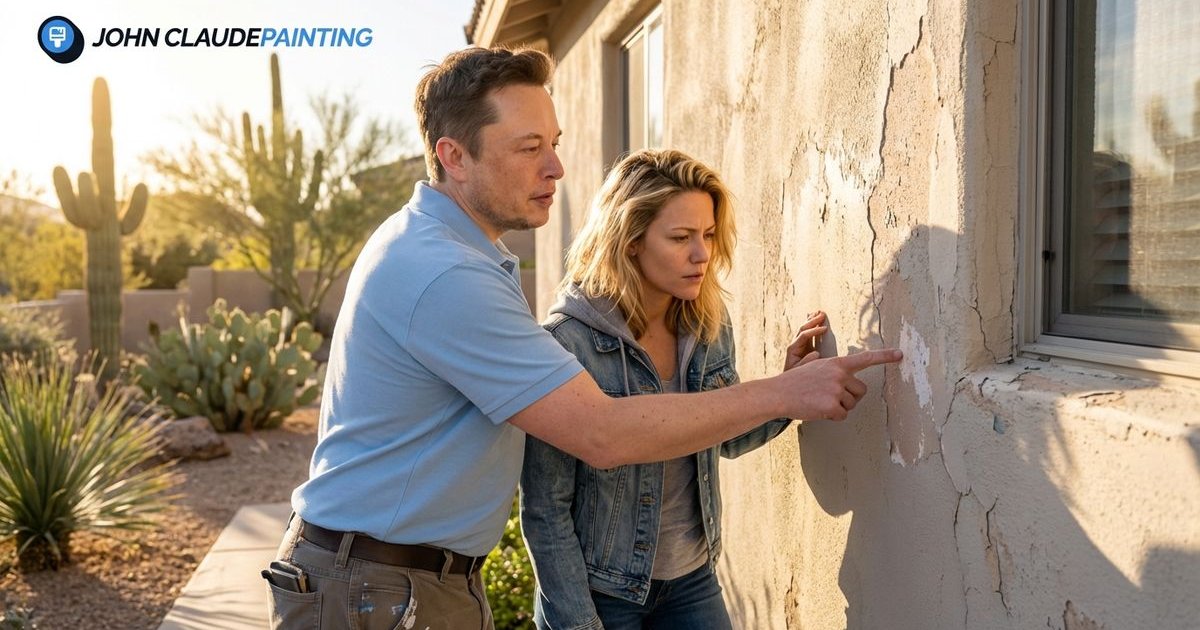
Problem 2: Cracks in Drywall
Cracks are inevitable in many stucco and drywall homes, but they require different treatments depending on their severity.
Types of Drywall Cracks
Hairline Cracks These are very fine and surface-level. You will often see them at the corners of doors or windows. They are usually cosmetic issues caused by minor settling.
Angle or “Off-Set” Cracks These run diagonally from the corners of window and door frames. They indicate structural movement or settling in the foundation.
Seam Failures These cracks follow a straight vertical or horizontal line. This means the original paper tape connecting the drywall sheets has failed or delaminated.
Comparing Repair Materials
Choosing the right tape is critical for our climate. We select materials based on the crack type.
| Material | Best Use Case | Why We Use It |
|---|---|---|
| Paper Tape | Corners & Seams | It is stronger than mesh for corners and resists cracking effectively when bedded properly. |
| Fiberglass Mesh | Flat Repairs | It is self-adhesive and works best with “hot mud” (setting compound) for quick, strong patches. |
| FibaFuse | Recurring Cracks | This porous glass mat tape allows compound to flow through it. It creates a stronger bond than paper for stubborn cracks. |
Our Crack Repair Process
For hairline cracks:
- We clean the crack of any loose debris.
- A high-performance elastomeric patch is applied.
- We sand it smooth and spot prime.
For seam and stress cracks:
- Our crew cuts a “V-groove” into the crack to create more surface area for the compound.
- We remove any loose tape from the original installation.
- New FibaFuse or paper tape is embedded in joint compound.
- We apply three progressively wider coats of mud to flatten the area.
- The area is sanded, textured, and primed.

Problem 3: Water Damage
Water damage is a serious issue that often appears after our summer monsoon storms or plumbing failures.
Signs of Water Damage
- Yellow or brown “tea-colored” rings on the ceiling.
- Bubbling, peeling, or flaking paint.
- Drywall that feels soft or spongy to the touch.
- Musty odors indicating potential mold growth.
The “48-Hour Rule” for Mold
Mold can begin to grow on damp drywall paper within 24 to 48 hours.
Speed is essential. If you suspect a leak, stop the water source immediately.
Water Damage Repair Strategy
Phase 1: Validation We confirm the area is 100% dry using a moisture meter. Painting over damp drywall traps moisture and causes immediate peeling.
Phase 2: The Stain Block (Crucial Step) Standard latex primer will not stop a water stain. The yellow discoloration will bleed through newly applied paint within days.
We use an oil-based or shellac-based primer, such as Zinsser B-I-N. This seals the stain permanently and provides a neutral base for the topcoat.
Phase 3: Structural Repair For soft drywall, we cut out the damaged section completely. Our team installs new gypsum board (usually 1/2 inch or 5/8 inch depending on code), tapes the seams, and blends the texture.
When to Call a Specialist
Painting is the final step. You should call a remediation specialist if:
- The area is larger than 10 square feet.
- You see visible black or green mold colonies.
- The water source is unknown or behind a tiled wall.
Problem 4: Texture Issues
Phoenix homes have a wide variety of wall textures compared to other parts of the country.
Matching them requires an artistic eye and specific techniques.
Common Local Texture Styles
Knockdown (California Knockdown) This looks like flattened blobs of compound. It is standard in many homes built in Chandler and Gilbert after 1990.
Santa Fe (Skip Trowel) This is a low-profile texture that looks like two layers of drywall. It features smooth areas interrupted by random “skips” of texture. It is very popular in custom Southwestern-style homes.
Orange Peel This resembles the skin of an orange. It is a splatter texture often found in bathrooms, kitchens, or older tract homes.
Texture Repair Options
Spot Matching This is the most common approach for small repairs. We use specialized hopper guns or hand-trowel techniques to mimic the specific pattern of your existing wall.
Skim Coating (Level 5 Finish) Some homeowners want to remove texture entirely for a modern, flat look. We apply multiple thin layers of compound over the entire wall to create a glass-smooth surface. This is a labor-intensive process but offers a sleek, contemporary result.
The “Feathering” Technique A bad patch looks like a scar because the new texture stops abruptly. We feather the new texture out 12 to 18 inches beyond the repair area. This fades the new pattern into the old one so the eye cannot catch the transition.
Problem 5: Holes and Dents
From doorknobs slamming into walls to moving furniture, holes are a daily occurrence.
Small Holes (Doorknobs and Anchors)
The Fix: We clean the loose paper from the edges of the hole. A setting-type compound (like Easy Sand 20) is used because it dries harder and shrinks less than standard spackle.
Medium Holes (1 to 4 Inches)
The California Patch: We use a technique often called a “butterfly patch” or “California patch.”
- We cut a piece of drywall slightly larger than the hole.
- The gypsum core is trimmed back, leaving the face paper intact as a flange.
- We apply compound to the hole and the paper flange.
- The patch fits into the hole, and the paper overlaps the wall surface for a seamless bond without tape.
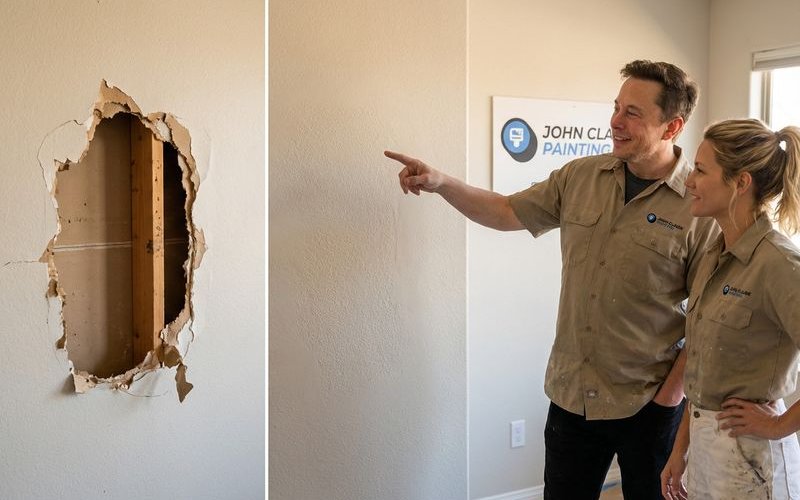
Large Holes (Over 4 Inches)
The Backing Method: Any hole larger than 4 inches needs structural support.
- We cut the hole into a clean square.
- A wood backing strip (1x2 or plywood) is screwed behind the existing drywall opening.
- We screw the new drywall patch into this wood backing.
- The seams are taped and mudded with three coats of compound.
The Professional Difference
You might wonder why a DIY patch often looks visible while a pro repair vanishes.
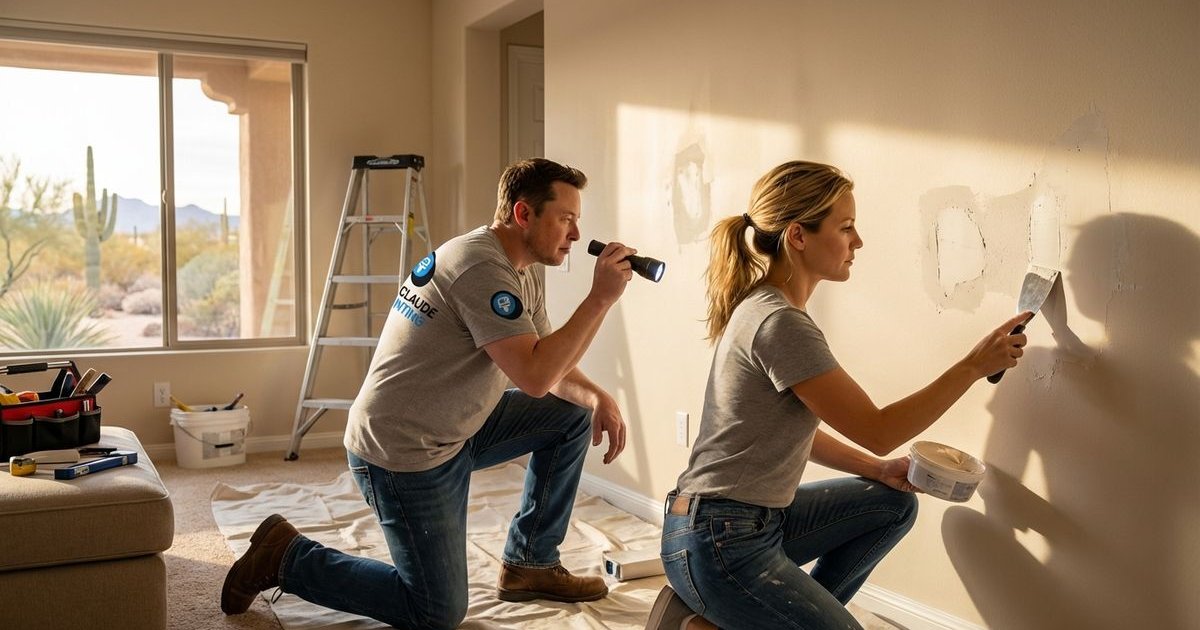
The “Raking Light” Test
We use a high-intensity LED light held against the wall at a sharp angle. This highlights ridges and humps that are invisible under normal lighting.
Correcting these flaws before painting prevents shadows from appearing later when the sun hits your walls.
Professional Benefits
- Material Knowledge: We know when to use lightweight mud versus all-purpose joint compound.
- Curing Times: We understand how humidity affects drying times in the Valley.
- Dust Control: Our team uses dustless sanding equipment to keep your home clean.
What We Include
At John Claude Painting AZ, our interior painting service includes comprehensive surface preparation.
Standard Preparation
- Filling of all nail holes and picture anchor divots.
- Repair of minor hairline cracks.
- Scuff sanding of glossy surfaces for better adhesion.
- Spot priming of repaired areas.
Additional Repairs (As Needed)
- Fixing extensive nail pop issues.
- Replacing water-damaged sections.
- Re-texturing walls to match renovations.
- Blocking severe water stains.
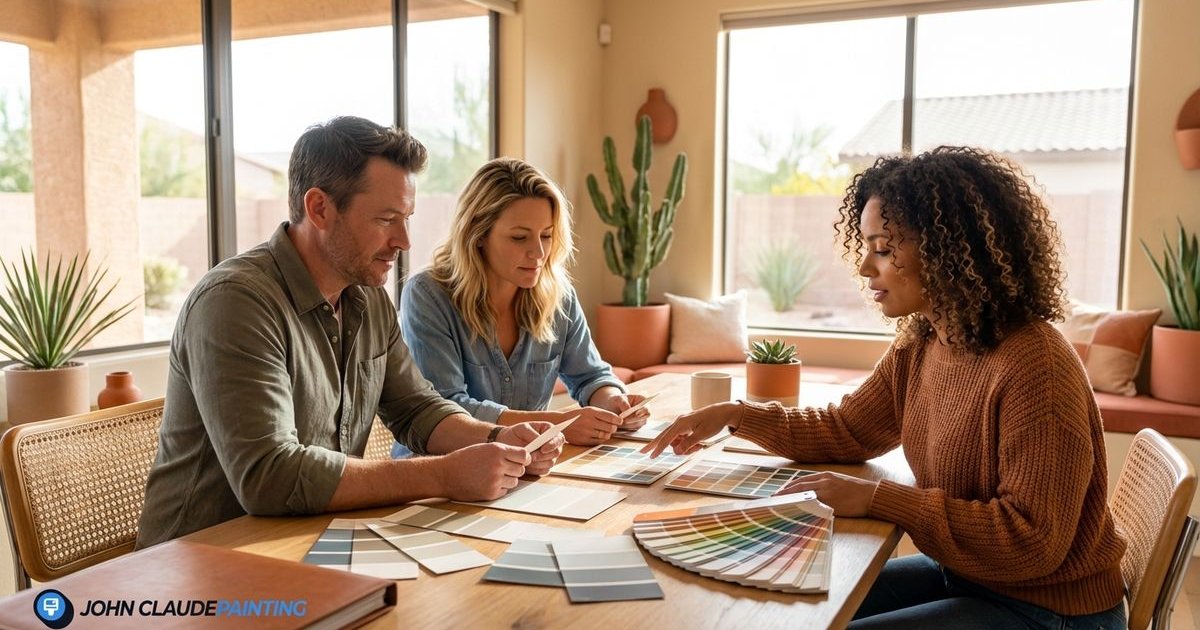
We examine every room during our walkthrough. You will receive an honest assessment of what is required to get that flawless finish.
Ready for Flawless Walls?
A great paint job always starts with smooth drywall. At John Claude Painting AZ, we refuse to cut corners on the preparation phase.
Our team ensures your walls are structurally sound and visually perfect before a single drop of paint is applied.
Call us at 602-572-1234 or contact us online for a free interior painting estimate. We proudly serve Phoenix, Chandler, Gilbert, Mesa, Tempe, Scottsdale, and the East Valley.
Not sure if that crack is serious? We provide honest assessments during our free estimates. We will show you exactly what we recommend and why.