You know how a fresh coat of paint makes a home look brand new, but that illusion shatters when it starts peeling off within a year?
If you need to know how to paint over stucco: step-by-step guide for desert homes, you already realize that a standard approach fails fast here. John Claude Painting AZ was established to provide premier residential and commercial painting solutions focused on professional craftsmanship, and our team sees this specific failure constantly across the valley. The combination of intense desert sun, monsoon moisture, and drastic temperature swings puts incredible stress on exterior surfaces.
Our team knows those 100-degree daily shifts turn quick weekend jobs into expensive failures. This playbook breaks down the exact process our crew uses on a real home in Ahwatukee or Chandler. You can use these methods to protect your investment, whether you hire a professional or tackle a small section yourself.
Why Stucco Needs a Different Playbook
Stucco is not drywall, and it is not wood siding. We treat it as a porous, mineral surface that drinks paint and actively moves with the temperature. Skipping that fundamental fact is the main reason paint peels off East Valley homes in just two summers.
The Arizona climate forces three major challenges onto every job. Our crew prepares for these specific environmental factors before opening a single can:
- Heat and UV Rays. Wall surfaces easily hit 140°F in July, then drop into the 80s after sundown. This extreme thermal shock makes the stucco expand and contract, while a summer UV index of 11+ rapidly degrades standard paint binders.
- Dust. Fine desert grit clings deep into the texture and physically blocks new paint from bonding to the surface.
- Cracks. Even structurally sound stucco shows hairline movement after a rough monsoon season.
Your preparation, primer selection, and final paint choice all need to address those three forces. We know that getting them right means a coat will hold strong for ten years. Get them wrong, and you will see chalking, peeling, or hollow spots before the next holiday season.
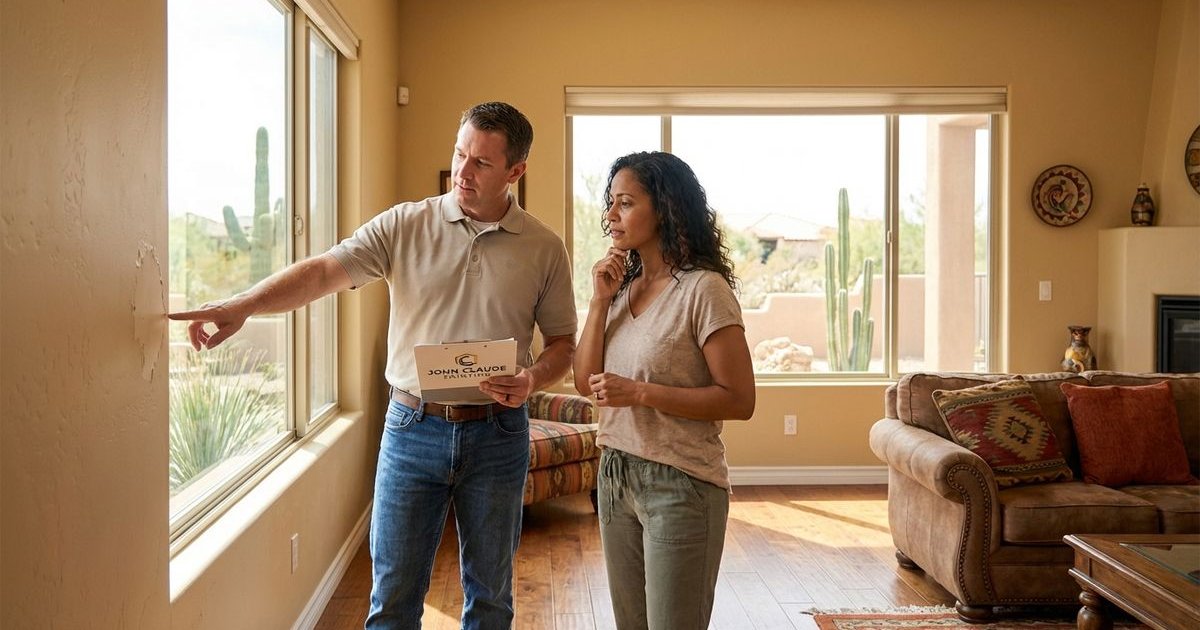
Step 1: Inspect the Walls in the Morning
Walk the full perimeter before you buy a single gallon of materials. We strongly recommend doing this before 9 a.m. so the sun remains low. The harsh angle of the morning sun casts long shadows that highlight texture flaws and show delamination perfectly.
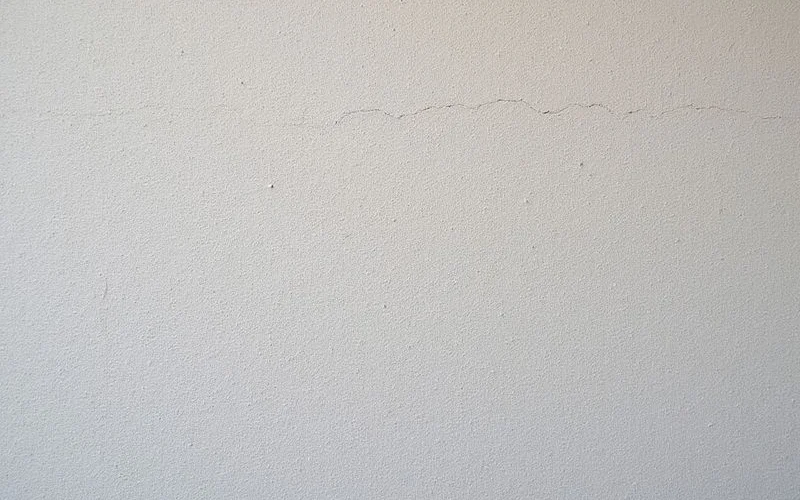
Look closely for these specific warning signs:
- Hairline cracks that originate from a window corner or door frame.
- Wider cracks you can physically fit a credit card into.
- Hollow or “pillowed” sections that produce a dull thud when tapped with a rubber mallet.
- Chalky, oxidized residue that rubs off onto your hand.
- Dark streaks under sprinkler heads or downspouts indicating moisture intrusion.
Mark each problem spot directly with painter’s tape. We use this mapping process to create a definitive repair list for the property. If you discover chalky residue rubbing off heavily, the old paint binder has completely failed from UV exposure.
Stop immediately and call a contractor if you find more than ten feet of wide cracks or any soft, crumbly stucco near the grade level. We consider that structural damage, not a simple paint job.
Step 2: Repair Before You Even Think About Paint
Paint film is about as thick as a sheet of printer paper. We see countless homeowners expect paint to bridge a real crack, but it simply cannot. Every flaw you skip will inevitably telegraph through the final finish within weeks.
For hairline cracks, use a high-quality, paintable elastomeric sealant rated specifically for stucco. Our preferred choice for gaps up to three inches wide is Sashco Mor-Flexx. This specific product combines the stretching power of rubber with a textured, mortar-like finish, so the repair blends invisibly instead of looking like a smooth rubber band.
Fixing the Details
Match the existing pattern in small test patches first using a sponge or dash brush. We find this texturing step is the part most people underestimate during a project.
This is also the perfect moment to handle the structural sealing. Caulk the open gaps around windows, reseal the bottom edge above the foundation, and physically trim back any plants touching the wall. A clean, tightly sealed envelope is the entire point of stucco repair before painting.
Let your standard patches cure for at least 24 hours. We require fresh stucco patches to cure for at least seven to thirty days before they accept paint without flashing. New stucco starts with a highly alkaline pH level around 13, and it must drop below 9 to prevent the chemicals from burning through your new paint film.
Step 3: Power Wash and Let It Dry
Stucco holds abrasive dust deep inside the texture profile. We know a standard garden hose will never move that baked-on dirt. You need a dedicated pressure washer running at 1,500 to 2,500 PSI with a 25-degree tip held about 18 inches away from the wall.
Work systematically from top to bottom in even, overlapping passes. Our technicians aim the wand slightly downward so the water flushes dirt out, rather than driving it deeper into the texture.
Pay extra attention to these trouble areas:
- North-facing walls where mildew and heavy oxidation settle.
- Sections under the roof eaves that rarely see natural rain.
- Foundation strips where dirt cakes aggressively from yard runoff.
Apply a masonry cleaner or Trisodium Phosphate (TSP) solution to those north-facing walls to fully break down the stubborn chalkiness. We let the walls completely dry after the final rinse. Stucco requires at least 24 hours of dry weather before applying primer, and you should verify the internal moisture content drops below 15 percent. Trapped moisture is the absolute silent killer of new exterior paint.
Step 4: Prime the Right Spots
You do not always need to prime an entire house. We only mandate a full primer coat in three specific situations:
- Bare patches of fresh cement.
- Heavily chalky old paint.
- Any exterior wall that has never been painted before.
Use a high-quality masonry primer for bare or freshly patched stucco. Our go-to product for severely chalky surfaces is Sherwin-Williams Loxon Conditioner. This specific bonding primer penetrates and locks down the powdery, friable stucco that power washing could not completely remove. Spot-prime only what needs it, as modern exterior paints handle sound, previously painted stucco perfectly without a full base coat.
Roll the primer aggressively into the texture using a 3/4-inch nap roller, then immediately back-brush to push it into the deep pockets. We insist on back-brushing because it creates vital mechanical adhesion inside the tiny gaps. Skipping this manual step leaves pinhole voids that show up later as tiny dark dots all over the wall.
Step 5: Pick Paint Built for the Desert
Not every standard “exterior” paint is a true desert paint. We rely on formulas specifically engineered to handle the relentless thermal shock of the Phoenix area. You want one of two primary product types for this climate:
| Paint Type | Best For | Trade-off |
|---|---|---|
| 100% Acrylic Latex | Most homes, smooth and lace stucco | Standard flexibility |
| Elastomeric Coating | Older stucco with active hairline cracks | Thicker, can trap moisture if applied wrong |
Choosing the Right Formula and Finish
Our top recommendation for local homes is Dunn-Edwards Evershield. This 100% acrylic formula breathes exceptionally well to prevent trapped moisture, and it offers superior UV resistance against color fading. Another excellent option is Sherwin-Williams SuperPaint, which effectively bridges small cracks without masking the original stucco texture under a thick, heavy layer.
A flat or low-sheen finish hides existing texture flaws best. We strongly advise avoiding satin or semi-gloss finishes on large, sun-facing walls because the shine highlights every single patch.
Stick with light-to-medium colors and check the Light Reflectance Value (LRV) on the back of the chip. Our rule of thumb is to choose colors with an LRV above 50 so the walls reflect heat rather than absorbing it. Deep tones soak up extreme heat, expand the wall much faster, and dramatically shorten the life of the coating.
For more details on choosing a tone that fits the neighborhood, read through the best exterior paint colors for Arizona before you stand in the paint aisle.
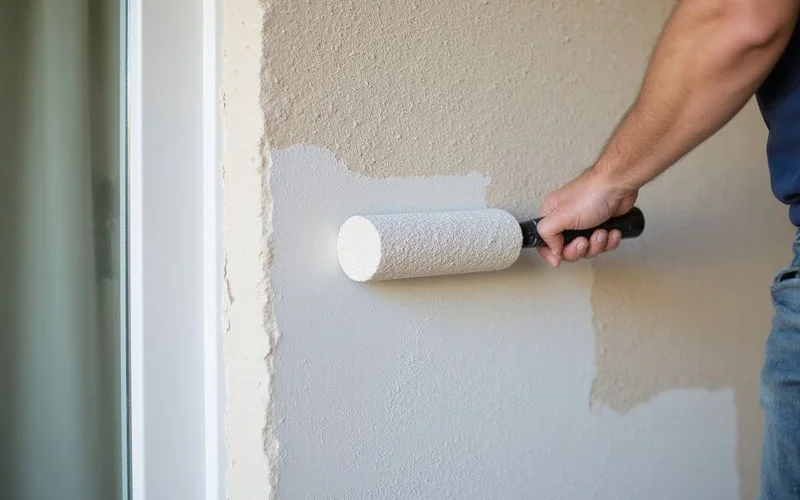
Step 6: Apply Two Full Coats the Right Way
The professional method is a coordinated “spray and back-roll” technique. We use an airless sprayer equipped with a 517 or 519 tip to lay the paint into the texture quickly. The roller then immediately pushes the material into the low spots and works out any thin areas to ensure proper Dry Film Thickness (DFT). If you only have a roller, use the same 3/4-inch nap and plan on significantly more physical effort.
Strict rules to follow on the wall:
- Paint entirely in the shade by chasing the shadow around the house throughout the day.
- Do not paint when the wall surface is hotter than 90°F or below 50°F.
- Do not paint if rain or strong wind is in the next 24-hour forecast.
- Keep a wet edge so each section blends smoothly into the next without visible lap marks.
- Apply two full coats to achieve the necessary mil thickness for long-term protection.
One single coat over textured stucco almost always looks patchy and fails prematurely. We mandate giving the surface at least four hours in the shade between coats, or longer if the local humidity is unusually high. Rushing the drying process is exactly how you end up with sticky spots and lap lines you cannot sand out later.
What to Watch Out For
A few very specific problems show up repeatedly on desert stucco projects. We inspect for these common failures on every single property:
- Painting in the direct sun. The paint flashes and dries completely before it can naturally level out. The fix is waiting for the shade, not buying a better grade of paint.
- Skipping the back-brush. This omission leaves voids deep in the texture that fill with dirt and dust within a single year.
- Using interior or builder-grade paint. Weak formulas simply cannot handle the UV index 11 summer days without breaking down.
- Painting fresh patches too soon. The naturally high pH of wet cement burns the delicate paint film and causes immediate peeling.
- Ignoring the bottom four inches. Splash zone failures start at the foundation line where water kicks up, often causing chalky efflorescence salts to bloom and push the paint off.
If you spot any of these issues on a half-finished project, stop and correct the course before rolling the next coat. We guarantee that fixing it now is far cheaper than paying for a full repaint in two seasons.
A Quick Recap
Executing a long-lasting stucco paint job in the East Valley comes down to six honest steps. We focus on inspecting the surface, repairing the flaws, washing thoroughly, priming where it counts, picking the right desert formula, and applying two full coats out of the blazing sun. Skip any of those mandatory phases, and the fragile finish will inevitably tell on you within a couple of heavy monsoons.
Following this how to paint over stucco: step-by-step guide for desert homes ensures your hard work actually survives the harsh climate. We handle full exterior painting projects across Phoenix, Chandler, Gilbert, Tempe, Mesa, and Scottsdale if you would rather hand the intense prep and ladder work over to a professional. The exact playbook described here is what guarantees our results on every single property. We always leave a small touch-up jar behind so you can keep the final finish looking sharp for years. Call the office today to schedule your comprehensive exterior assessment.